Well, when it comes to your roof, dead valleys are kind of subjective. Let Realm Inspections explain from our perspective. One thing to keep in mind is that we don’t call out dead valleys as a deficiency in a home inspection report. Why? Simply stated, it is a design element that originates with the designer or architect. The inclusion of these elements is in part due to complex rooflines and layouts of the floorplans of the home.
What is a dead valley?
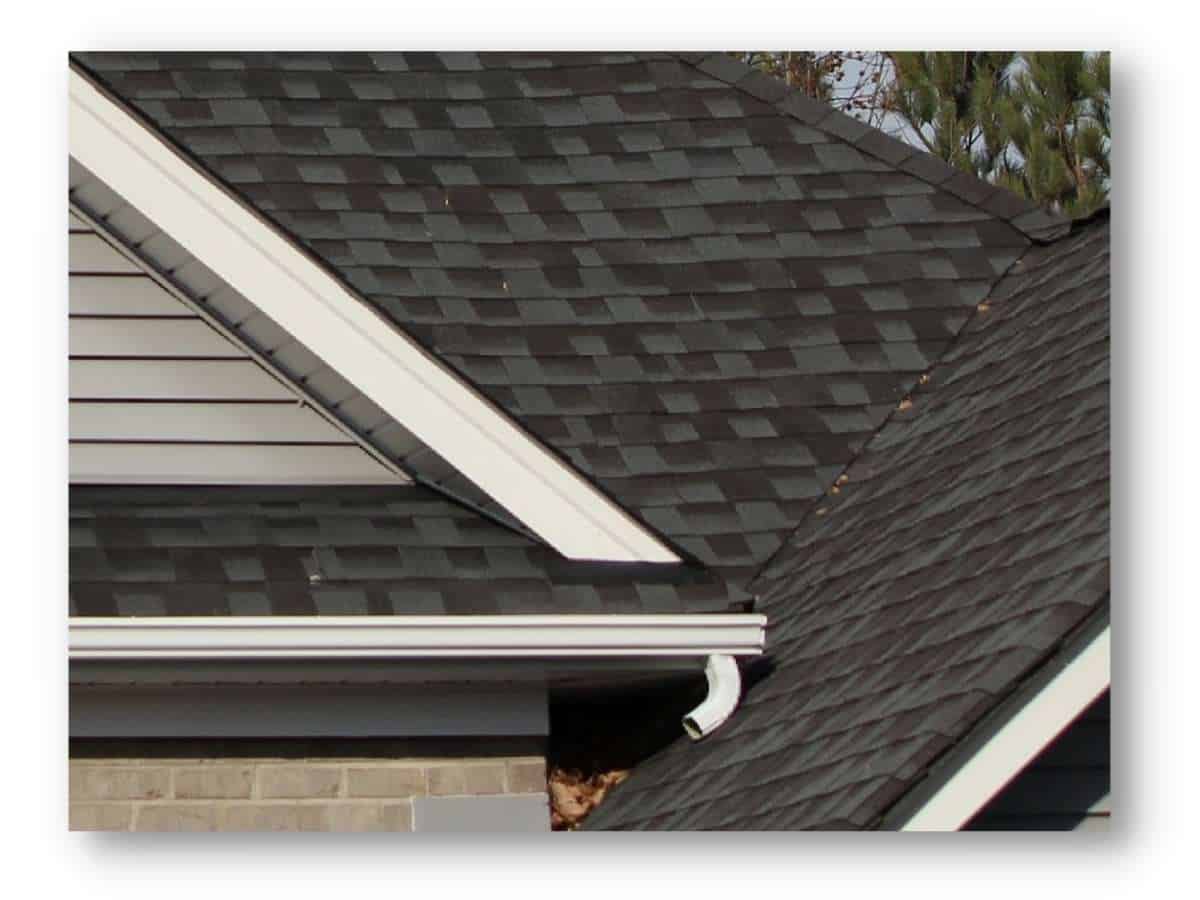
Dead valleys are where multiple roof slopes converge
You keep using these words, so what the heck do they mean? Dead valleys are where multiple roof slopes converge. But what does that mean exactly? Well, as mentioned above, is a design element of the roof on a home. It is where two or more roof planes or roof planes and sidewalls converge in such a way that they concentrate water runoff to a small area. Think of them as a funnel. You will typically see them collecting debris on a roof surrounded by trees. You may also notice a deluge of water pouring off your roof at the base of one of these valleys during a storm
The Problem
Tree debris collecting in a roof valley
Debris Accumulation: The most obvious issue with a dead valley is the collection of debris. Trees shed their leaves, twigs, pollen husks, nuts, acorns, amongst other things. In a perfect world, the rain will wash the debris off the roof. However, this area will create a bottleneck that traps the debris. This trapped debris holds water against the covering, gradually deteriorating the shingles and shortening the roof’s useful life.
Construction Challenges: Older homes may face construction challenges with dead valleys. Improper installation of roofing layers can result in water leakage. Modern advances have improved construction, but older homes may not benefit from these advancements. New construction inspections confirm these roof sections are properly built.
Erosion: High volumes of water rushing down from dead valleys can cause erosion. This can lead to damage to landscaping, splash-back on less durable siding, and even affect windows and doors if not properly managed.
Water at the Foundation: Excessive moisture near the foundation due to dead valleys can lead to foundation issues. Soil movement around the foundation can result in differential settlement and hydrostatic pressure, destabilizing the foundation.
What can I do?
Wide channels to account for high volumes of water from a dead valley
Aside from being on the design team when the plans were drafted for your home, not much can be done about dead valleys. However, you can:
Develop a maintenance routine to keep debris from building up.
Ensure proper water drainage away from the foundation using gutters, downspouts, diverter heads, and other drainage systems.
Aim to discharge water a minimum of 4-6 feet away from the foundation wall to prevent water damage.
When it comes to a dead valley on your roof, vigilance is key.
If you are in need a professional home inspector in Fuquay Varina or the surrounding Raleigh, NC market, contact Realm Inspections for the best in home inspection services! But I already own my home. Perfect! We are big advocates of proactive homeownership. Get in front of any potential hardships and have us perform a Home Maintenance Inspection on your home. Schedule today!
Your home’s life expectancy and when to replace the things in your home.
Wouldn’t it be great if your home and all the stuff in it came with a timer so that you would have some clue as to when something was about to fail and needed replacement? Of course it would. But we know the reality isn’t so accommodating. The way it goes, something fails and catches us off guard leaving us to react in the moment. Well, fortunately enough, there is enough data out there to give us some insight to the general life expectancy of most home components and appliances.
The following rundown includes the most common items in or on our home and how often they need replacing. Now suffice it to say that this list provides the average life expectancies accounting for usage, exposure, and a myriad of other variables… in short, your mileage may vary.
Roof
A shingle roof being removed
The life expectancy of your roof really depends on where you live, along with building design, materials and how much work you put into maintaining it. According to the National Association of Home Builders, a tile, copper or slate roof can last more than 50 years. Wood shake roofs should last about 30 years, while you’ll get about 25 years out of fiber cement. Asphalt shingles will give you about 20 years of reliable service if you take care of them properly. If you are among the lucky few that have a thatched roof, you can get up to 60 years of service… but again only if it is properly maintained.
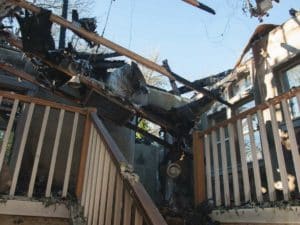
Deck
Like your roof, your deck’s life expectancy depends greatly on climate and maintenance. The International Association of Certified Home Inspectors estimates decks made from wood planks lasts about 15 years, while structural wood gives you 10 to 30 years. Composite decking will last anywhere from 8 to 25 years.
Exterior Materials
Siding
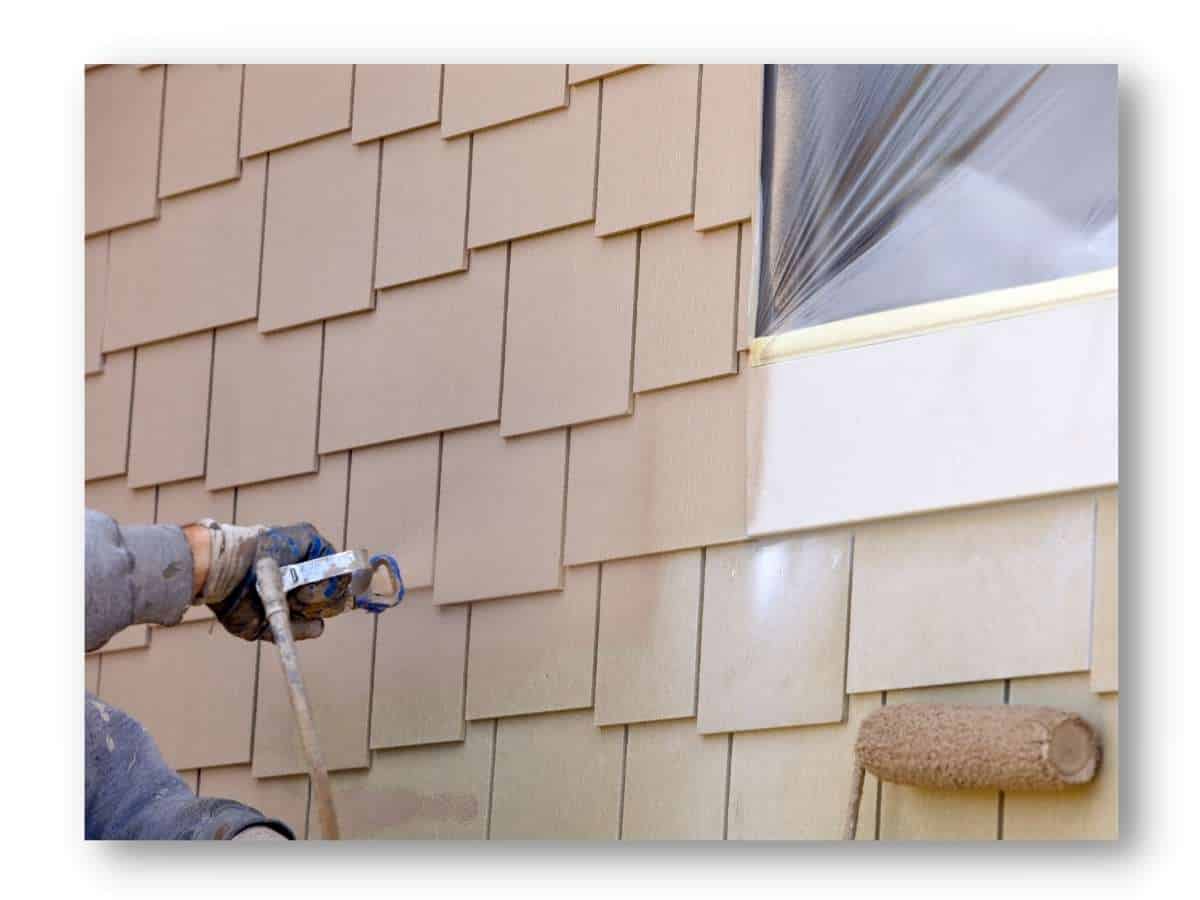
Fiber cement shake style siding being painted
Many homeowners will never have to replace their home’s exterior materials such as brick, stone, vinyl and fiber cement (Hardie)—all should outlast you. If you happen to have composite fiberboard siding (known by the brand name Masonite), unfortunately, will likely need to be replaced sooner than later. This type of siding was subject to numerous class action lawsuits due to its poor performance and high failure rate. Most those suits have expired, so if you have fiberboard siding on your house you will want to take very good care of it. It is necessary to seal and paint fiberboard every 3 years. It may be more cost effective to just replace the siding with more robust materials. Other exterior items like aluminum gutters and your wood shutters should be good for about 20 years.
Foundations
You shouldn’t have to worry about your foundation but only if you have termite and waterproof foundations, expect those things to last around 10 to 12 years before you’ll have to reapply.
Kitchen Items Life Expectancy
Cabinets
Kitchen cabinets should last around 50 years, but you can always update them so they look modern. Medicine cabinets have a shorter shelf life of 20 years while garage and laundry cabinets should last more than 100 years. Your closets should last the life of the house.
Countertops
Stone countertops should last a lifetime while marble countertops typically last around 20 years. Composite countertops tend to fair a little better at 25 years average life expectancy. Laminate countertops have a shorter lifespan of 10 to 20 years because of the wear and tear they take on. Some best practices for stone is to keep them sealed so stains don’t set in (stone is porous, it will stain).
Dishwasher
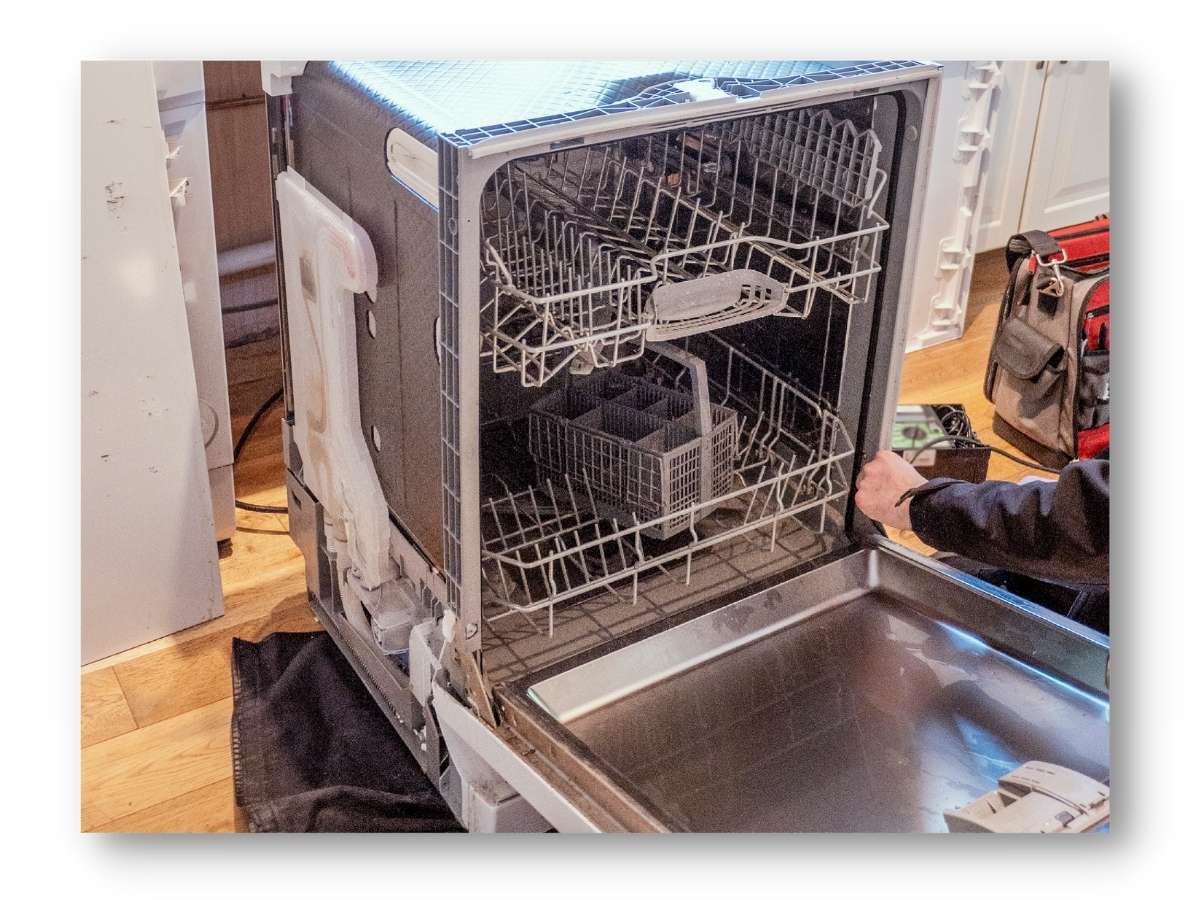
A new dishwasher being installed
Consumer Reports asked manufactures of 13 dishwasher brands to weigh in on the lifespan of the appliance, and 10 years is about the norm. All manufactures noted it’s important to follow the owner’s manual and regularly clean out your dishwasher to keep it running properly. Dishwashers have strainers that need to be cleaned otherwise you’ll be blessed with a stinky washer. The strainers should be cleaned every 2 weeks or so.
Garbage Disposal
Garbage disposals last around 12 years… unless you have folks in your home that believe everything goes into a disposal. (I have a story about an entire roast and a disposal… the roast won). One note about disposals, they also require maintenance. Check the web for simple tricks to keep it running in top condition. Disposals also lock up, this doesn’t necessarily mean they broke. They often come with a key that you insert into the unit to “unlock” it. This frees any garbage that may have gotten lodged within.
Refrigerator
You’ll get about 6 to 15 years out of your refrigerator, according to leading polls. The most common refrigerator repairs include ice maker failure, main control board failure and a clogged drain.
Stovetop and Oven
When it comes to your kitchen cooktop and oven, how long it lasts depends on the type and how often you use it. According to the International Association of Certified Home Inspectors (InterNACHI), you can expect to get 10 to 18 years out of your gas oven and 15 to 17 years out of your gas range. An electric range will last 13 to 15 years.
Laundry Room Replacements
Washing Machine
Washing machines need to be cleaned too
The average life of a washing machine is 8 to 12 years. Keeping a washing machine in good working order is extremely challenging, repairing them rarely offers a return on investment. A good rule to follow, consider a new machine if the repair exceeds $500. The most common repairs include gasket replacements, switch failures, and valve issues. On rare occasions the entire main control board of the washer fails.
Clothes Dryer
Ten years is the average life expectancy of a clothes dryer, which conveniently aligns with the motor warranties they come with. To help increase your dryer’s life, keep the dryer vent clean and consider air drying when possible. Speaking of dryer vents, make sure that you have the right type in place, see our blog about dryer vents (yeah, a whole blog dedicated to this, odd).
Plumbing Life Expectancy
Toilet
When it comes to your home’s toilet, it can be hard to say how long it will last. However, there are some things that can tell you when it needs to be replaced. If, for instance, you’re constantly rebuilding the fill-valve and flapper, it suffers recurring clogs, or has a crack in the porcelain, you may be due for a new toilet. The newer models come with various features like jetted flush, vacuum flush, etc. From my experience the less “flash” your commode comes with, the less likely something will break. Simple is better here.
Water Heater
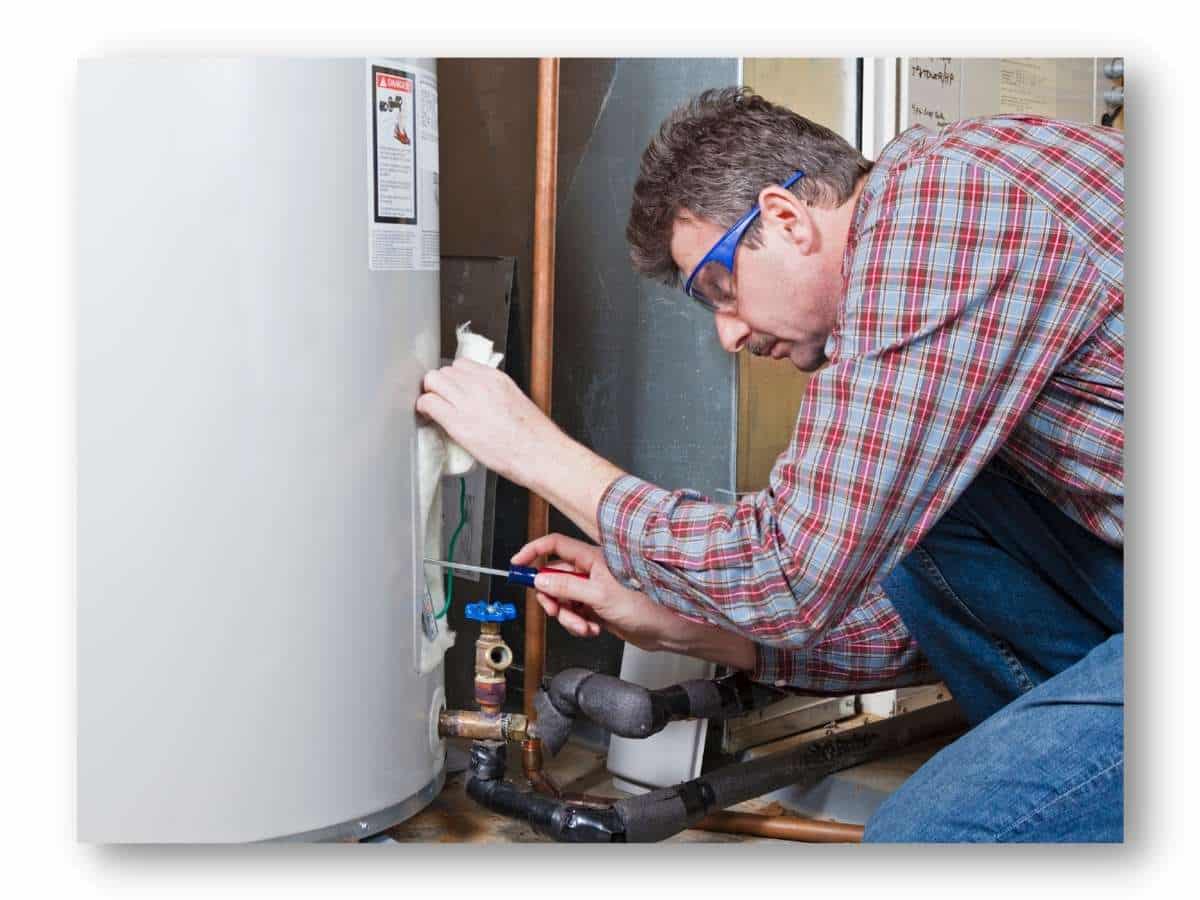
Water heater maintenance should be done annually
A general rule for water heaters older than 10 years, consider replacement. Some signs that your water heater is about to die include rusty water, rumbling noises and leaks. Maintenance plays a large part in the life expectancy of a water heater too. Draining the unit every year helps to rid the tank of debris that accelerates aging. Newer tanks claim to not require this standard in water heater maintenance, but being a skeptic, I would drain it anyway. Another required maintenance item, and one often overlooked, is failing to monitor and replace the sacrificial anode rod. The sacrificial anode rod, as its name implies, sacrifices itself for the sake of the water heater tank. Corrosive elements in the water will attack the rod before the tank’s interior wall. Forgetting to replace the spent anode rod means the water is literally eating away at your tank.
Faucets and Sinks
Faucets really vary when it comes to their life expectancy. Some work properly for 15 years while most last around 50 years. After all, you get what you pay for. Typically with faucets, the valve stems and gaskets fail, which are relatively easy and inexpensive fixes. More times than not, aesthetics will force a faucet replacement rather than outright failure. Shower enclosures typically remain in good condition for 50 years but shower doors are considerably less at around 20 years. Whirlpool tubs have a lifespan of 20 to 50 years, another wide variation that is typical of usage.
Flooring
You can expect your wood flooring to last about 100 years. Doing the math on how old the home is versus when you moved in should give you an idea as to how long you have left with them. Regardless, floors still need upkeep. Vinyl flooring lasts about 50 years, while you’ll get about 10 years out of your carpet. When it comes to tile flooring, life expectancy depends on the type of tile, maintenance and the foot traffic its subjected to.
Whole Home Replacements
Doors
Exterior doorsshouldlast the lifetime of the house. Screen doors and vinyl doors, however, typically only last 20 to 40 years. French doors usually last 30 to 50 years.
HVAC System
Get HVAC check ups before every heating and cooling season.
Your home’s heating, ventilation and air conditioning systems should last you 15 to 25 years with proper upkeep. Furnaces should average about 15 to 20 years. However, many homeowners choose to update their furnace after 10 to 15 years for a more efficient model, but the question you need to ask yourself is are you making the return on the investment.
Masonry
Brick fireplaces should last the life of a house and brick walls should extend past 100 years.
Wiring/Electrical
If installed within the last 40 years, most wiring should last a lifetime whereas electric components like, lighting controls typically last a little more than a decade.
GFCI Receptacles
Test GFCI receptacles every few months
GFCI receptacles, a required safety device, also needs replacing every 15 to 20 years. Some may fail as early as 5 years so its important to always test your GFCI receptacles. Make sure the “Test” and “Reset” buttons work. If there is any issue with either button, replace the unit. Depending on when the house was built, conducting an audit to confirm GFCIoutletsareinstalled in all locations required by modern standards is highly beneficial.
Smoke and Carbon Monoxide Detector Alarms
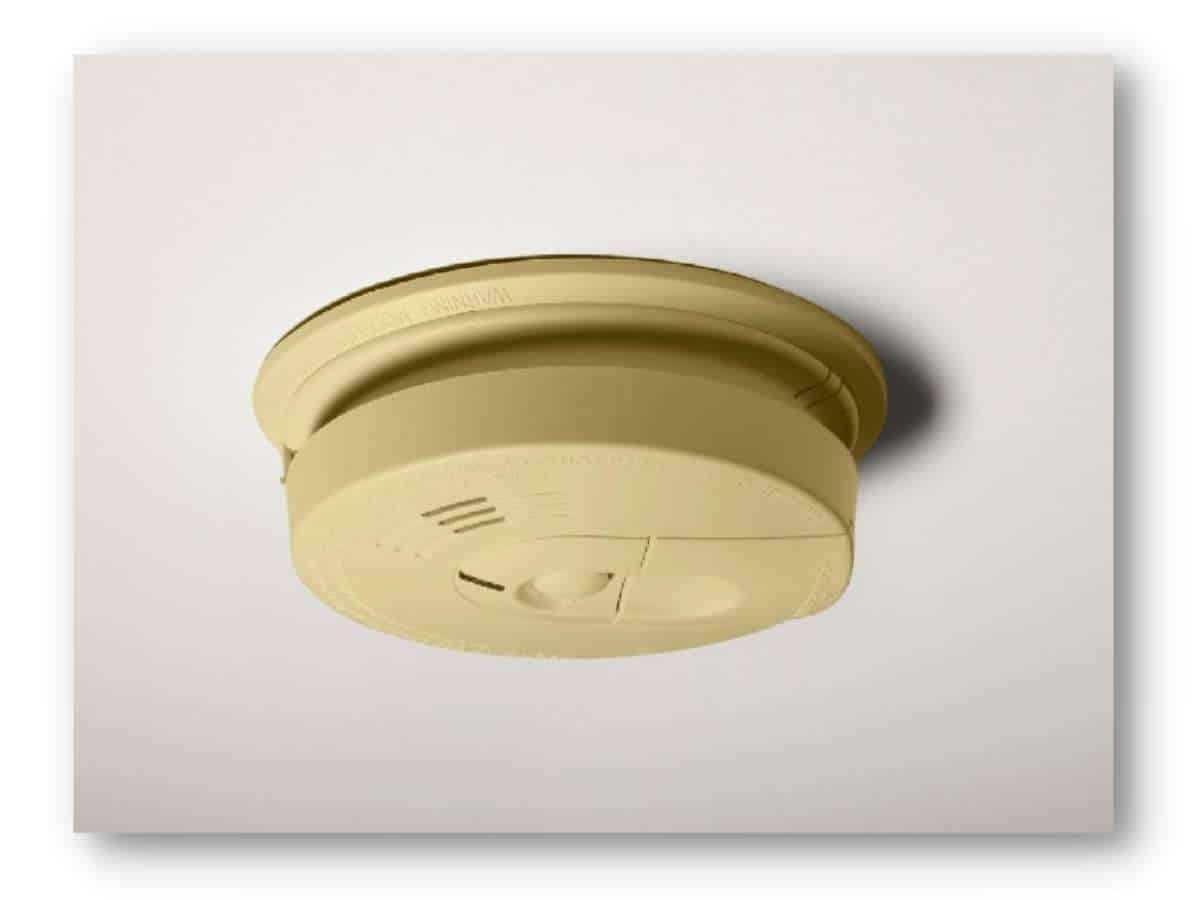
Yellowed detector alarms need to be replaced.
Smoke and Carbon Monoxide Detector Alarms have a life expectancy as well. Resin used in the manufacturing of their covers discolors with age. If you have units in your house that look a bit dingy and have yellowed, then its time to replace them. Check out our blog post about the various types of Smoke and Carbon Monoxide Detector Alarms and the ones that best suit your needs. This link takes you to the modern standards for placement in your home. Add more for the best coverage in case of an emergency.
Paint
Interior and exterior paint will typically last around 15 years before you’ll need to apply new coats or repaint.
Windows
Aluminum windows have an average lifespan of 15 to 20 years while wooden ones run a little longer at 30 years.
If you didn’t already know, the two most commonly recognized smoke detector types are ionization smoke detection and photoelectric smoke detection. Oh, and just an FYI, do not confuse “photoelectric” with “photochemical” as I did. They are not the same. The latter is the technology used in Carbon Monoxide (CO) detectors… which I’ll save for another post.
So, Ionization vs Photoelectric, which smoke detector types are right for me? Is there really a difference?
To answer the first question, it depends. To answer the second question, yes there really is. Here’s the truth, you can ask 10 different people and get 10 different opinions. From my seat, I think response time is the ultimate qualifier. While both respond to fire in relatively short order, it’s the smoldering fire (no flame) that is the deciding factor for me. Most people know that the #1 killer of fires is smoke inhalation, not the flames. So wouldn’t we err on the side of caution and go with the technology that detects smoke the fastest? The simple answer, yes, of course, we would. And for that reason, photoelectric should be the clear winner. However, it is important to acknowledge that not all fires are smoldering fires. So, with that consideration, a device comprising both technologies would be the absolute winner.
Now, just like everything else that is good for us, there is a cost associated with the different technologies. Photoelectric is more expensive than ionization, and combination units are more expensive than all others. Ultimately, cost should be the least of your concerns when outfitting your home with smoke detection devices. For me and my loved ones, combination units are the ones going in my home.
Hate reading? Check out this 5-minute video demonstrating the different smoke detector types. It may just save your life!
Let’s take a deeper dive into the different smoke detector types.
• Ionization smoke alarms
The most common smoke detector types (usually due to cost) are Ionization smoke alarms. These are generally more responsive to fires with visible flames or environments heavily saturated with smoke. How they work:Ionization-type smoke alarms have a small amount of radioactive material between two electrically charged plates. These plates ionize the air and cause current to flow between the plates. When smoke enters the chamber, it disrupts the flow of ions, thus reducing the flow of current and activating the alarm. Download this chart on ionization smoke alarms.
• Photoelectric smoke alarms
Photoelectric smoke alarms are generally more responsive to fires that begin with a long period of smoldering (called “smoldering fires”). Think of a cigarette that may not have been fully extinguished and dumped in the trash. Another example is that of an overheating appliance that doesn’t actually burn but smokes before a flame is present.
How they work:Photoelectric-type alarms aim a light source into a sensing chamber at an angle away from the sensor. Smoke enters the chamber, reflects the light onto the sensor, thus triggering the alarm. Download this chart on photoelectric smoke alarms.
The U.S. Fire Administration (USFA) is aware that there is a controversy about smoke detector types and which is most appropriate to protect people in their homes.
The body of scientific knowledge about fire, smoke, and smoke detection has developed over many years and is quite extensive. The USFA has either fully or partially funded a number of research efforts. These include a recent study by the National Institute of Standards and Technology’s (NIST) Center for Fire Research. Other contributors to this data include the Consumer Product Safety Commission (CPSC), the National Fire Protection Association, Underwriters Laboratories, the Home Fire Safety Council, the Residential Fire Safety Institute, the Home Fire Sprinkler Coalition, and distinguished academics with expertise in smoke alarm and sensor technology.
The body of research reflects the following:
There are two types of smoke alarms in general use for home smoke alarms, Photoelectric and Ionization. These smoke alarms sense the prese
nce of smoke differently.
The type of smoke produced by fire depends on the type of fire. Flaming fires produce a different type of smoke than smoldering fires.
Both smoke alarms will detect the smoke from either a smoldering fire or a flaming fire. It has been established and well known for many years that:
Ionization smoke alarms tend to respond faster to the smoke produced by flaming fires than photoelectric smoke alarms.
Photoelectric smoke alarms tend to respond faster to the smoke produced by smoldering fires than ionization smoke alarms.
In some full-scale fire tests, the difference in the time to alarm between ionization and photoelectric smoke alarms was found to be trivial. In other full-scale fire tests, the difference in response time was considerable.
Based on this information, the USFA provides guidance to the public and to state and local legislative bodies. Either body may be grappling with the issue of determining which smoke detector types to select for residential use. Their guidance includes:
We cannot state that one type of alarm is better than another because every fire is different.
Because both ionization and photoelectric smoke alarms are better at detecting distinctly different yet potentially fatal fires, and because no one can predict what type of fire might start in a home, the USFA recommends that every home and place where people sleep be equipped with either
both ionization and photoelectric smoke alarms, or
dual sensor smoke alarms (which contain both ionization and photoelectric smoke sensors).
The location of a smoke alarm within a home may be more important than the type of smoke alarm present, depending on the location of a fire. The USFA recommends that users follow the manufacturer’s guidance along with current standards on the recommended location of smoke alarms in a home.
To wrap this up
For each of the smoke detector types, the advantage they provide may be critical to life safety in some fire situations. Fatal home fires, day or night, include a large number of smoldering fires and a large number of flaming fires. You cannot predict the type of fire you may have in your home or when it will occur. Any smoke alarm technology, to be acceptable, must perform for both types of fires in order to provide sufficient warning. Regardless of the type of fire, for all times of the day or night, and whether you are asleep or awake. For the best protection, use both types of smoke alarm technologies.
Buying a home? It’s probably the most expensive purchase you’ll ever make. This is no time to shop for a cheap inspection. The cost of a home inspection is very small relative to the value of the home being inspected. The additional cost of hiring an InterNACHI-Certified Professional Inspector® is almost insignificant.
You have recently been crunching the numbers, negotiating offers, adding up closing costs, shopping for mortgages, and trying to get the best deals. Don’t stop now. Don’t let your real estate agent or anyone else talk you into skimping here. InterNACHI-certified inspectors perform the best inspections by far.
InterNACHI-certified inspectors earn their fees many times over. They do more, they deserve more, and — yes — they generally charge a little more. Do yourself a favor… and pay a little more for the quality inspection you deserve.
The licensing of home inspectors only sets a minimum standard. Even though required in the state of North Carolina, being licensed is really only akin to the price of admission. Much like being up to code, any less would be illegal. Imaginary people, children, psychics (who claim to “sense” if a house is OK), and even pets can theoretically be home inspectors. InterNACHI, the International Association of Certified Home Inspectors, front-ends its membership requirements.
InterNACHI inspectors must:
Pass InterNACHI’s Online Inspector Examination, and re-take and pass it every three years
Complete InterNACHI’s online Code of Ethics Course
Take InterNACHI’s online Standards of Practice Course
Submit a signed Membership Affidavit
Carry E&O Insurance (also required by NC Home Inspector Licensing Board);
Adhere to InterNACHI’s Standards of Practice
Abide by InterNACHI’s Code of Ethics
Submit four mock inspection reports to InterNACHI’s Report Review Committee before performing their first paid home inspection for a client if the candidate has never performed a fee-paid home inspection previously
Within the first year of membership, Inspectors must successfully pass the following accredited courses and exams provided through InterNACHI:
“Safe Practices for the Home Inspector”
“25 Standards Every Inspector Should Know”
“Residential Plumbing Overview for Inspectors”
“How to Perform Residential Electrical Inspections”
“How to Perform Roof Inspections”
“How to Inspect HVAC Systems”
“Structural Issues for Home Inspectors”
“How to Perform Exterior Inspections”
“How to Inspect the Attic, Insulation, Ventilation, and Interior”
“How to Perform Deck Inspections”
“How to Inspect for Moisture Intrusion”
“How to Inspect Fireplaces, Stoves, and Chimneys”
Pursue inspection-related training by taking 24 hours of additional accredited Continuing Education each year
Original article was written by Nick Gromicko, CMI®, Ben Gromicko, and Kenton Shepard. Updated and revised by Joe Boos, CPI
Most people don’t know how easy it is to make their homes run on less energy, and here at InterNACHI, we want to change that.
Homeowners can make drastic reductions in heating, cooling, and electricity costs through very simple changes, most of which they can do themselves. Of course, for homeowners who want to take advantage of the most up-to-date knowledge and systems in home energy efficiency, InterNACHI energy auditors can perform in-depth testing to find the best energy solutions for your particular home.
Why make your home more energy efficient? Here are a few good reasons:
Federal, state, utility, and local jurisdictions’ financial incentives, such as tax breaks, are very advantageous for homeowners in most parts of the U.S.
It saves money. It costs less to power a home that has been converted to be more energy-efficient.
It increases the comfort level indoors.
It reduces our impact on climate change. Many scientists now believe that excessive energy consumption contributes significantly to global warming.
It reduces pollution. Conventional power production introduces pollutants that find their way into the air, soil, and water supplies.
1. Find better ways to heat and cool your house.
As much as half of the energy used in homes goes toward heating and cooling. The following are a few ways homeowners can reduce energy bills through adjustments to the heating and cooling systems:
Install a ceiling fan. Ceiling fans require much less energy than air conditioning units. The moving air across and around our bodies reduces the perceived temperature by almost 10°. Similar to wind-chill factor.
Periodically replace air filters in air conditioners and heaters. Replace them every quarter or monthly if you have pets.
Set your thermostats to an appropriate temperature. Specifically, they should be turned down at night and when no one is home. About 2% of the heating bill will be saved in most homes for each degree that the thermostat is lowered for at least eight hours each day. Turning down the thermostat from 75° F to 70° F, for example, saves about 10% on heating costs.
Install a programmable thermostat. A programmable thermostat saves money by allowing heating and cooling appliances to be automatically turned down when no one is home and at night. Programmable thermostats contain no mercury and, in some climate zones, can save up to $150 per year in energy costs.
Better yet, install a smart thermostat. You can fully customize your system to maintain the temperature in your home. Set up geofencing so the thermostat knows when people are home and can adjust the temperature without any input. You can also control the thermostat remotely or set up vacation schedules. The system can modify the temperature during vacation mode outside normal comfort ranges allowing you to save even more money if you intend to be away for an extended amount of time.
Install a wood stove or a pellet stove. These are more efficient sources of heat than furnaces.
At night, curtains drawn over windows will better insulate the room.
2. Install a tankless water heater.
Demand-type water heaters (tankless or instantaneous) provide hot water only as it is needed. They don’t produce the standby energy losses associated with traditional storage water heaters, saving energy costs. Tankless water heaters heat water directly without the use of a storage tank. When a hot water tap is turned on, cold water travels through a pipe into the unit. A gas burner or an electric element heats the water. As a result, demand water heaters deliver a constant supply of hot water. You don’t need to wait for a storage tank to fill up with enough hot water. One caveat to a tankless system is to make sure it is appropriately sized for the demand of multiple simultaneous users.
3. Replace incandescent lights.
The average household dedicates 11% of its energy budget to lighting. Traditional incandescent lights convert approximately only 10% of the energy they consume into light, while the rest becomes heat. The use of new lighting technologies, such as light-emitting diodes (LEDs) and compact fluorescent lamps (CFLs), can reduce the energy use required by lighting by 50% to 75%. Advances in lighting controls offer further energy savings by reducing the amount of time that lights are on but not being used. Here are some facts about CFLs and LEDs:
CFLs use 75% less energy and last about 10 times longer than traditional incandescent bulbs.
LEDs last even longer than CFLs and consume less energy.
LEDs have no moving parts and, unlike CFLs, they contain no mercury.
Better yet, swap out some of the most commonly used bulbs for smart bulbs. Like the smart thermostat, smart bulbs give you complete control over the lighting. The backend systems allow you to deploy scenes based on time of day and occupancy.
4. Seal and insulate your home.
Sealing and insulating your home is one of the most cost-effective ways to make a home more comfortable and energy-efficient, and you can do it yourself. A tightly sealed home can improve comfort and indoor air quality while reducing utility bills. An InterNACHI energy auditor can assess leakage in the building envelope and recommend fixes to increase comfort and energy savings dramatically.
The following are some common places where leakage may occur:
electrical receptacles/outlets
mail slots
around pipes and wires
wall- or window-mounted air conditioners
attic hatches
fireplace dampers
inadequate weather-stripping around doors
baseboards
window frames
switch plates
Because hot air rises, air leaks are most likely to occur in the attic. Homeowners can perform a variety of repairs and maintenance to their attics that save them money on cooling and heating, such as:
Plug the large holes. Locations in the attic where the leakage is most likely to be the greatest are where walls meet the attic floor, behind and under attic knee walls, and in dropped-ceiling areas.
Seal the small holes. You can easily do this by looking for areas where the insulation is darkened—darkened insulation results from dusty interior air being filtered by insulation before leaking through small holes in the building envelope. In cold weather, you may see frosty areas in the insulation caused by warm, moist air condensing and freezing as it hits the cold attic air. In warmer weather, you’ll find water staining in these same areas. Use expanding foam or caulk to seal the openings around plumbing vent pipes and electrical wires. Cover the areas with insulation after the caulk is dry.
Seal up the attic access panel with weather-stripping. You can cut a piece of fiberglass or rigid foamboard insulation in the same size as the attic hatch and glue it to the back of the attic access panel. If you have pull-down attic stairs or an attic door, these should be sealed similarly.
5. Install efficient showerheads and toilets.
Homeowners can install the following to conserve water usage in homes:
Low-flow showerheads. They are available in different flow rates, and some have a pause button that shuts off the water while the bather lathers up;
Low-flow toilets. Toilets consume 30% to 40% of the total water used in homes, making them the most significant water users. Replacing an older 3.5-gallon toilet with a modern, low-flow 1.6-gallon toilet can reduce usage by an average of 2 gallons per flush (GPF), saving 12,000 gallons of water per year. Low-flow toilets usually have “1.6 GPF” marked on the bowl behind the seat or inside the tank;
Vacuum-assist toilets. This type of toilet has a vacuum chamber that uses a siphon action to suck air from the trap beneath the bowl, allowing it to fill with water to clear waste quickly. Vacuum-assist toilets are relatively quiet; and
Dual-flush toilets. Dual-flush toilets have been used in Europe and Australia for years and are now gaining in popularity in the U.S. Dual-flush toilets let you choose between a 1-gallon (or less) flush for liquid waste and a 1.6-gallon flush for solid waste. Dual-flush 1.6-GPF toilets reduce water consumption by an additional 30%.
6. Use appliances and electronics responsibly.
Appliances and electronics account for about 20% of household energy bills in a typical U.S. home. The following are tips that will reduce the required energy of electronics and appliances:
Refrigerators and freezers should not be located near the stove, dishwasher, or heat vents or exposed to direct sunlight. Exposure to warm areas will force them to use more energy to remain cool.
Computers should be shut off when not in use. If unattended computers must be left on, their monitors should be shut off. According to some studies, computers account for approximately 3% of all energy consumption in the United States.
Use efficient ENERGY STAR-rated appliances and electronics. These devices, approved by the U.S. Department of Energy and the Environmental Protection Agency’s ENERGY STAR Program, include TVs, home theater systems, DVD players, CD players, receivers, speakers, and more. According to the EPA, if just 10% of homes used energy-efficient appliances, it would reduce carbon emissions by the equivalent of 1.7 million acres of trees.
Chargers, such as those used for laptops and cell phones consume energy when they are plugged in. When they are not connected to electronics, chargers should be unplugged.
Laptop computers consume considerably less electricity than desktop computers.
7. Install daylighting as an alternative to electrical lighting.
Daylighting is the practice of using natural light to illuminate the home’s interior. It can be achieved using the following approaches:
Skylights. They must be double-pane, or they may not be cost-effective. Flashing skylights properly is key to avoiding leaks.
Light shelves. Light shelves are passive devices designed to bounce light deep into a building. They may be interior or exterior. Light shelves can introduce light into spaces up to 2½ times the distance from the floor to the top of the window, and advanced light shelves may introduce four times that amount;
Clerestory windows. Clerestory windows are short and wide, set high on the wall. Protected from the summer sun by the roof overhang, they allow winter sun to shine through for natural lighting and warmth; and
Light tubes / Sun tubes. Light tubes use a unique lens designed to amplify low-level light and reduce light intensity from the midday sun. Sunlight is channeled through a tube coated with a highly reflective material and then enters the living space through a diffuser designed to distribute light evenly.
8. Insulate windows and doors.
About one-third of the home’s total heat loss usually occurs through windows and doors. The following are ways to reduce energy lost through windows and doors:
Seal all window edges and cracks with rope caulk, the cheapest and most straightforward option.
Windows can be weather-stripped with a special lining that is inserted between the window and the frame. For doors, apply weather-stripping around the whole perimeter to ensure a tight seal when they’re closed. Install quality door sweeps on the bottom of the doors if they aren’t already in place.
Install storm windows at windows with only single panes. A removable glass frame can be installed over an existing window.
If existing windows have rotted or damaged wood, cracked glass, missing putty, poorly fitting sashes, or locks that don’t work, they should be repaired or replaced.
9. Cook smart.
An enormous amount of energy is wasted while cooking. The following recommendations and statistics illustrate less wasteful ways of cooking:
Convection ovens are more efficient than conventional ovens. They use fans to force hot air to circulate more evenly, thereby allowing food to be cooked at a lower temperature. Convection ovens use approximately 20% less electricity than conventional ovens.
Microwave ovens consume approximately 80% less energy than conventional ovens.
Cook with pans that match the size of the heating element or flame.
Using lids on pots and pans will heat food more quickly than cooking in uncovered pots and pans.
Pressure cookers reduce cooking time dramatically.
When using conventional ovens, place food on the top rack. The top rack is hotter and will cook food faster.
10. Change the way you do laundry.
Do not use the medium setting on your washer. Wait until you have a whole load of clothes, as the medium setting saves less than half of the water and energy used for a full load.
Avoid using high-temperature settings when clothes are not very soiled. Water that is 140° F uses far more energy than 103° F for the warm-water setting, but 140° F isn’t that much more effective for getting clothes clean.
Clean the lint trap every time before you use the dryer. Not only is excess lint a fire hazard, but it will prolong the amount of time required for your clothes to dry.
If possible, air-dry your clothes on lines and racks.
Spin-dry or wring clothes out before putting them into a dryer.
Homeowners who take the initiative to make these changes usually discover that the energy savings are more than worth the effort. InterNACHI home inspectors can make this process much easier because they can perform a more comprehensive assessment of energy savings potential than the average homeowner can.
Buying a new home is a significant investment that comes with a good amount of tax breaks.
A common question often asked, “Can I Deduct a Home Inspection on My Taxes”?
The short answer is “no.”
While there are many tax benefits to owning a home, deducting the home inspection, unfortunately, is not one of them. However, if it’s an investment property, such as a rental, deduct away.
Tip:If you are starting the process and have a moderate amount of flexibility, consider purchasing a multiplex. You can live in one of the units and rent out the others. In that instance, you can deduct your inspection cost since it is now considered a business expense.
I digress…
When you purchase a home, you may hear that closing costs are deductible. Closing costs or settlement costs (they’re the same thing), often get split between the buyer and the seller. Your escrow closing statement will have an itemized list of the costs paid at closing. The mortgage interest and the property tax paid is deductible. Borrowers pay points when closing the loan to reduce the interest rate; these are usually deductible.
While these items are not deductible, they get added to the basis of your home. This means that when you sell your home, the costs are added to the original purchase price to determine capital gains. For example, if you bought a house for $850,000 and paid $1,200 in non-deductible fees, your new cost basis is $851,200.
Investment Property Expenses
It is considered an investment property when you are not using the single-family property as your residence or personal vacation home. The IRS allows rental property owners to deduct many more expenses because it is now considered a business. I suggest you contact your Accountant or Tax Attorney for specifics.
To give you the best experience, we use cookies and similar tech to store or access your device info. If you don't agree or change your mind later, some features might not work properly.
Functional
Always active
The technical storage or access is strictly necessary for the legitimate purpose of enabling the use of a specific service explicitly requested by the subscriber or user, or for the sole purpose of carrying out the transmission of a communication over an electronic communications network.
Preferences
The technical storage or access is necessary for the legitimate purpose of storing preferences that are not requested by the subscriber or user.
Statistics
The technical storage or access that is used exclusively for statistical purposes.The technical storage or access that is used exclusively for anonymous statistical purposes. Without a subpoena, voluntary compliance on the part of your Internet Service Provider, or additional records from a third party, information stored or retrieved for this purpose alone cannot usually be used to identify you.
Marketing
The technical storage or access is required to create user profiles to send advertising, or to track the user on a website or across several websites for similar marketing purposes.


 rs, adding up closing costs, shopping for mortgages, and trying to get the best deals. Don’t stop now. Don’t let your real estate agent or anyone else talk you into skimping here. InterNACHI-certified inspectors perform the best inspections by far.